Generating Random Mazes with JavaScript

I didn’t get a chance to hit the pumpkin patch this year, so I missed out on seeing any corn mazes. To make up for it, I decided to make some mazes of my own! Being a programmer, I over-engineered it and built a random maze generator!
Here’s an example maze that it generated:

I made a CodePen that animates the creation of random mazes so you can watch how the algorithm works. (Click “Randomize” to generate a new maze.)
Defining Constraints
There are lots of different types of mazes and ways to make them. Before I started writing code, I thought through what I wanted from a maze and what would keep me from going off the deep end of complexity. There were some basic constraints I landed on:
- The maze would be rectangular. Hexagonal and circular mazes are cool, but they seem much more complicated!
- There would be one single path through the maze.
- The path would always go from the left edge to the right edge.
- It should be possible to visit every square in the maze.
With these constraints in mind, I was ready to start planning.
The Game Plan
I broke down the maze creation into three steps:
- Create a rectangular grid.
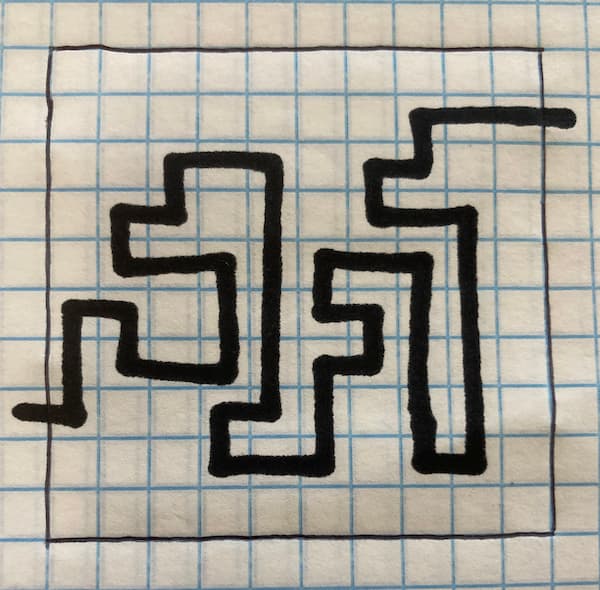
- Find a path from the left side of the grid to the right.
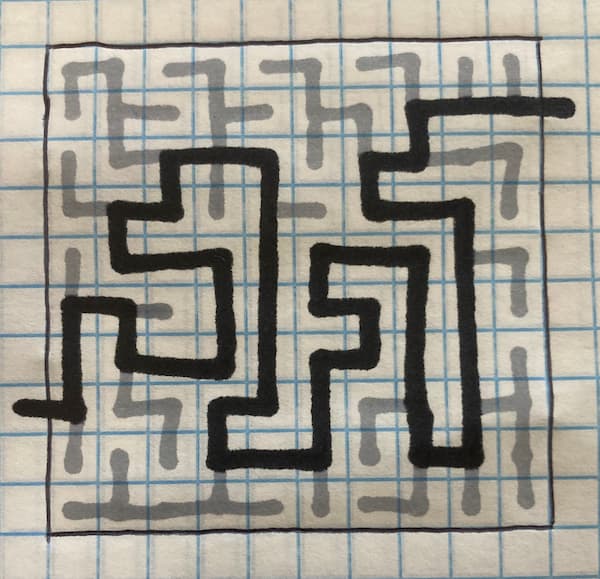
- Branch off the main path to fill in the rest of the grid.
Some quick sketches on graph paper can help understand these steps without writing any code:
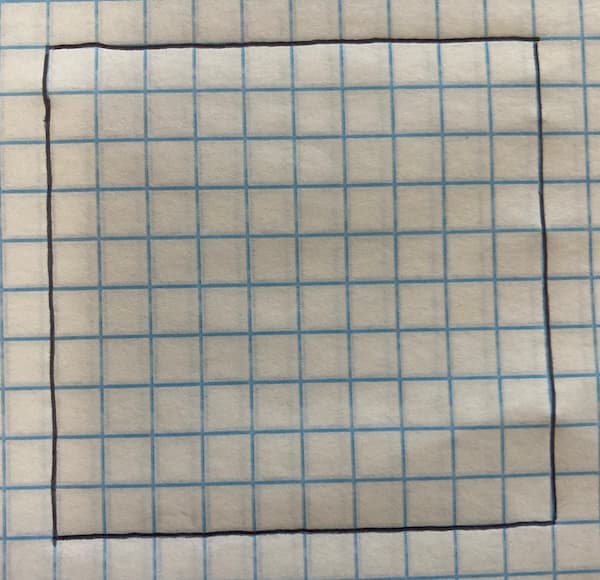
Step 1: Create a Rectangular Grid
First off, we need to make some choices about our grid. For now, we’ll start with a ten-by-ten grid. We’ll store these choices as variables to reuse them and make them easy to change later:
const gridHeight = 10;
const gridWidth = 10;
Code language: JavaScript (javascript)Step 2: Finding a Path Through the Maze
Now, we need to find a path from the left edge to the right edge. We can store the path as a series of points with X and Y coordinates. Here’s what the main path from the drawing above would look like:
const mainPath = [
  {x: -1, y: 7},
  {x: 0, y: 7},
  {x: 0, y: 6},
  {x: 0, y: 5},
  {x: 1, y: 5},
  /* ... more points ... */
  {x: 9, y: 1},
  {x: 10, y: 1}
];
Code language: JavaScript (javascript)
We’ll need to pick a starting point for our maze. We’ll choose a random Y coordinate and add two points using it: one off the left edge of our grid and one just inside the grid:
import { randomInt } from 'https://unpkg.com/randomness-helpers@0.0.1/dist/index.js';

function mainPathStartPoints() {
  const yStart = randomInt(0, gridHeight - 1);

  return [
    {
      x: -1,
      y: yStart
    },
    {
      x: 0,
      y: yStart
    }
  ]
}
Code language: JavaScript (javascript)
Note: In this article, I’ll use some helpers from an npm package I made called randomness-helpers to help with repetitive tasks like picking random integers and array items. If you’re curious about how they work, check out the GitHub Repo.
From here, we need to build the rest of our path. First, we’ll write a function that takes a point and returns a random point on the grid next to it:
import { randomItemInArray } from 'https://unpkg.com/randomness-helpers@0.0.1/dist/index.js';

function findNextPoint(point) {
  // Build an array of adjacent points
  const potentialPoints = [];

  // If "up" is within our grid add it as a potential point
  if(point.y - 1 > 0) {
    potentialPoints.push({
      y: point.y - 1,
      x: point.x
    });
  }

  // If "down" is within our grid, add it as a potential point
  if(point.y + 1 < gridHeight) {
    potentialPoints.push({
      y: point.y + 1,
      x: point.x
    });
  }

  // If "left" is within our grid, add it as a potential point
  if(point.x - 1 > 0) {
    potentialPoints.push({
      y: point.y,
      x: point.x - 1
    });
  }

  // If "right" is within our grid, add it as a potential point
  if(point.x + 1 < gridWidth) {
    potentialPoints.push({
      y: point.y,
      x: point.x + 1
    });
  }

  // Randomly pick one of these points to add to our path
  return randomItemInArray(potentialPoints);
}

Code language: JavaScript (javascript)
We can call this function repeatedly to build our path. We’ll stop calling it when we’ve reached the right end of our grid. Then, we’ll add a final point off the right edge.
function getMainPathPoints() {
  const mainPathPoints = mainPathStartPoints();

  // Keep adding points until our last point is on the right edge
  while(mainPathPoints.at(-1).x > gridWidth - 1) {
    mainPathPoints.push(findNextPoint(mainPathPoints.at(-1)));
  }

  // Add another point with the same Y coordinate as our final point,
  // but off the right edge.
  mainPathPoints.push({
    x: gridWidth,
    y: mainPathPoints.at(-1).y
  });
}


Code language: JavaScript (javascript)
In the code sample above we’re using the array method at to get the final point in our array.
We’re getting close, but there’s a major problem with our logic. Can you spot it? (Click “Draw Path” below to see it in action.)
Our path keeps doubling back on itself. There are a few problems with this:
- There are way too many paths through the maze! It’s too easy!
- It takes a looong time to get to the right edge.
- We don’t know which cells we’ve filled, so we don’t know how to draw the rest of the maze.
- (This also causes an issue with how our maze is drawn, but that’s a separate problem that will fix itself when we fix the others.)
We can fix all of these issues by keeping track of which cells are already visited and not visiting them again. We can make a 2-dimensional array in JavaScript, with a 0 representing each empty cell. To mark a cell as occupied, we can flip that 0 to a 1.
const gridData = new Array(gridHeight).fill().map(
  () => new Array(gridWidth).fill(0)
);
Code language: JavaScript (javascript)
That gives us an array that looks like this:
[
  [0, 0, 0, 0, 0, 0, 0, 0, 0, 0],
  [0, 0, 0, 0, 0, 0, 0, 0, 0, 0],
  [0, 0, 0, 0, 0, 0, 0, 0, 0, 0],
  [0, 0, 0, 0, 0, 0, 0, 0, 0, 0],
  [0, 0, 0, 0, 0, 0, 0, 0, 0, 0],
  [0, 0, 0, 0, 0, 0, 0, 0, 0, 0],
  [0, 0, 0, 0, 0, 0, 0, 0, 0, 0],
  [0, 0, 0, 0, 0, 0, 0, 0, 0, 0],
  [0, 0, 0, 0, 0, 0, 0, 0, 0, 0],
  [0, 0, 0, 0, 0, 0, 0, 0, 0, 0],
]
Code language: JavaScript (javascript)
We’ll add another function to mark a specific grid cell as “taken” by flipping the 0 to a 1:
function markPointAsTaken(point, value = 1) {
  gridData[point.y][point.x] = value;
}
Code language: JavaScript (javascript)
Here’s what the grid array would look like after drawing a path through the maze and marking points as taken:
[
  [0, 0, 0, 0, 0, 0, 0, 0, 0, 0],
  [0, 0, 0, 0, 0, 0, 0, 1, 1, 1],
  [0, 0, 1, 1, 1, 0, 1, 1, 0, 0],
  [0, 1, 1, 0, 1, 0, 1, 1, 1, 0],
  [0, 1, 1, 1, 1, 1, 1, 1, 1, 0],
  [1, 1, 0, 1, 1, 1, 1, 1, 1, 0],
  [1, 1, 1, 1, 1, 1, 1, 1, 1, 0],
  [1, 0, 0, 1, 1, 1, 0, 1, 1, 0],
  [0, 0, 0, 1, 1, 1, 0, 1, 1, 0],
  [0, 0, 0, 0, 0, 0, 0, 0, 0, 0],
]
Code language: JavaScript (javascript)
We’ll add another helper function to check if a specific grid cell is on the grid and empty. (We’ll update the findNextPoint function we wrote above to only return available points.)
function isCellEmpty(point) {
  // Check if the cell is off our grid
  if(
    point.x < 0 ||
    point.x >= gridWidth ||
    point.y < 0 ||
    point.y >= gridHeight ||
  ) {
    return false;
  }

  // Check the grid cell and see if it's empty.
  return gridData[y][x] === 0;
}
Code language: JavaScript (javascript)
Now, we’ve got all the tools we need to find a path across the grid. But there’s one decision we still need to make: what do we do if we get “stuck?” (If all of the adjacent grid cells are taken, where do we go?)
The simplest solution is to just give up and restart our path if we get stuck. Click “Draw Path” a few times below to see this in action:
This works well enough, but if we try to use this logic for a larger grid, it can take a long time to find a valid path:
We can make our logic a little smarter by trying to “back out” a few steps if we get stuck and continue from another position. This has a better chance of finding a path through the grid with fewer tries. (We’ll still start over if we get really stuck.) Try out the demo below to see this option in action.
The code for this is tricky to explain so I’m not going to dig into it here, but feel free to check out the CodePen to see how it works
Step 3: Branch off the main path to fill in the rest of the grid.
Whew, that was a lot! But we’re almost there. Now that we have our main path, we just need to fill in the grid. We’ll add a helper function that will tell us whether every cell in the grid is occupied or not:
function mazeComplete() {
  // Flatten our array of arrays into a single array.
  // Then check whether they're all set to 1.
  return gridData.flat().every(cell => cell === 1);
}
Code language: JavaScript (javascript)
Now, we can keep looping until the grid is full. We’ll create an array of additional paths that we’ll populate with points. In each loop we’ll take a few steps:
- Iterate over every path, adding another point to the path if possible
- Iterate over all of the points in all of our paths, randomly adding new paths at some of those points
- Keep going until the grid is full!
import { randomChance } from 'https://unpkg.com/randomness-helpers@0.0.1/dist/index.js';

const otherPaths = [];

function buildOtherPaths() {
  while(!mazeComplete()) {
    // Add some more paths
    addMorePaths();

    // Iterate over our paths
    otherPaths.forEach((path) => {
      // Try and add another point to each path
      const nextPoint = findNextPoint(path.at(-1));

      if(nextPoint) {
        path.push(nextPoint);
        markPointAsTaken(nextPoint);
      }
    });
  }
}

function addMorePaths() {
  // Iterate over all of the cells in the grid
  gridData.forEach((row, y) => {
    row.forEach((cell, x) => {
      // If a cell is occupied, set a 10% chance to start a new path from that cell
      if(cell && randomChance(0.1)) {
        otherPaths.push([{
          y,
          x,
        }]);
      }
    })
  })
}
Code language: JavaScript (javascript)
The code above will keep adding new paths and growing those paths until the entire grid is full. That gives us a complete maze! Click “Randomize” to generate new mazes!
From this starting point, you can draw the maze using your technique of choice. I’m using SVG because it works well for vector shapes like this, but canvas or even a CSS Grid would also work.
This was a fun experiment. We thought through how mazes work and explored different JavaScript techniques for drawing them. Check out the CodePen for the full code. Feel free to play with this and create your own mazes. Try changing the size and color of the maze, or think through how similar techniques could be used to draw circular or hexagonal mazes!


